AI Node Documentation
Overview
With LLM technology emerging it gets more clear that the future of automation and automation workflows are a lot about handling input and output from these models. Their capabilities of processing data in various shapes and forms, from unstructured emails to semi-structured API responses, are superior to alternative approaches in the field of Natural Language Processing (NLP). LLMs scan, classify, and structure data right out of the box with just some right prompting approaches. Named entity recognition, classification, computer vision (object detection and image description) took big amounts of sophisticated infrastructure and highly specialized engineers. This all can be now done with prompts and context to a LLM. The current definition of an AI Agent is a Large Language Model that has an optional knowledge base (RAG), can use tools, and can act autonomously in the background without having to be prompted by the user for every task. The knots flow AI node is the backbone of AI Agentic workflows.
We will explain the core concepts in the following.
Configuration
Here is the expanded AI node - we will explain all the parts in the following:
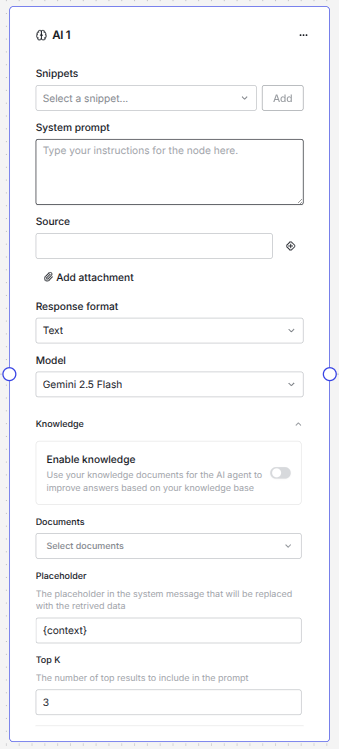
Snippets
One of the most important parts on how to instruct a LLM is to define a good system prompt. There is a whole field emerging that is now called prompt engineering, since there are a lot of different techniques on how you can tell a LLM what you want it to perform. Knots flow is built so that you can design your AI agent in a fast way. We provide Snippets that are building blocks and examples for system prompts for LLMs.
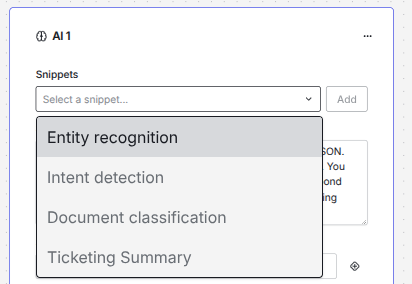
You can select one of the snippets and press the Add button. The text will then be inserted where your cursor on the System prompt input field is. Like this you can even combine the snippets, if you want to construct a more complex system prompt.
Note
There are a lot of resources available on prompt engineering. You can refer to the MS Azure "Prompt engineering techniques" article since it has some valuable insights on generic best practices. Usually, markdown is a very good format for LLMs. System prompts in English usually work better than in other languages. Be aware that sometimes the system prompt language can affect the output. If you need another language in the output, instruct the model accordingly to do so. If you are already an expert you can even switch to the developer view and have the full sequence of messages available. These are usually structured in the roles of "system", "agent" and "user".
System prompt
The system prompt is the main field where you instruct the LLM what you want it to do. The system message is the core of every AI Agent - it gives it its identity - if you want to frame it like this.
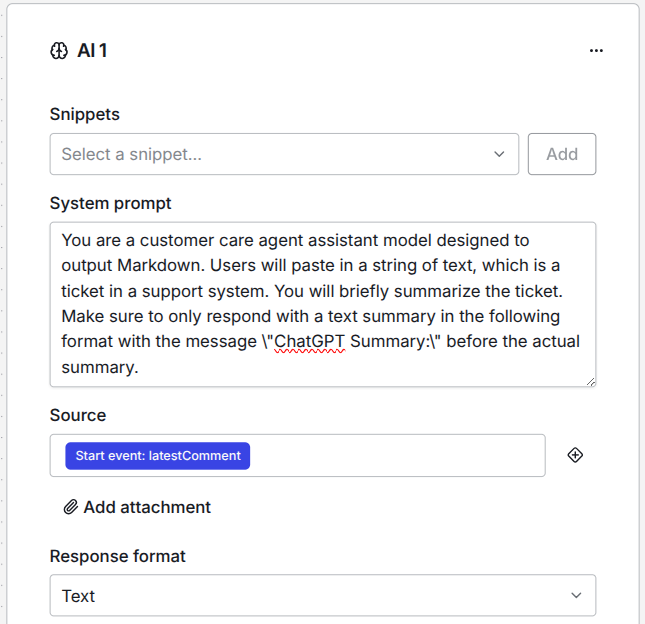
As you can see in this example, you have to tell the LLM what role it should play. You literally tell it what it is and what you want it to perform. The more and better context you give to the model, the better it will perform at the given task.
Note
For LLMs it is all about the context. The context goes against the token window of a LLM and is relevant for token caching. This is also why this metric is so important for fundamental models. The bigger the context window is, the more context you can give to a LLM and the broader are the tasks that it can perform or also, the more exact it can do the tasks that you described to it. If you want to feed specific documents to the model, so that it can get domain knowledge, like certain documents it should always take in regard, please refer to the RAG section.
You also can give the model some examples of tasks it should do directly in the system prompt. However, if you want to perform few shot learning it is best to use the developer view and structure the messages in a "system, user, assistant, user" sequence, since this tells the model also what you would have expected as an outcome. This is an extremely helpful technique. If you struggle with the setup here, please reach out, since we can help you with the settings.
Source
After you made the perfect system prompt you need to give the AI node the information what the "Input" or the Source is. This is usually the "user message" in the sequence of messages to a LLM.

You have access to all available data in the flow. You can add a source by pressing the + icon next to the field.
Info
You will only see all available inputs if you have already connected the node with the previous nodes. So, please make sure you already know where in your flow you want to work with AI, so that you will see all possible options.

In our quickstart we showed you how you can send all data you want to the workflow. You always have access to all the data but it is more convenient, if you have already connected the nodes accordingly.
Danger
Be aware that the user input is always untrusted. We advise that you structure your workflow accordingly. Never inject variables directly in the system prompt that come from untrusted sources. Be aware that there exist the threat of prompt injection attacks. Always build your workflow with this in mind. If you have any doubts on how to handle the data you want to process, please reach out to us!
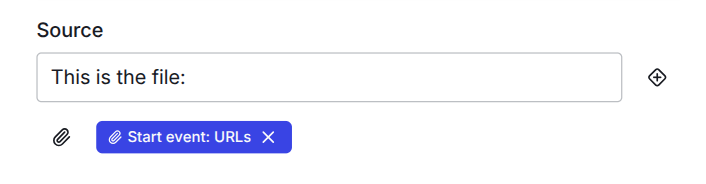
Add attachment
Below the source field you find a button that states "Add attachment"
Info
Attachments are right now only supported by Gemini models. So please make sure you have chosen the right model type on the AI node.
The field takes an array of URLs, where the model can download the files. The correct format is
You can have more files than one like this in one single workflow execution. Files are usually embedded in the user prompt. This is why you can give additional information in the source field (which is the user message). Since Gemini models are multi modal you can input quite a variety of file types. You can process pdfs, also scans of pdfs, audio, video and most common office files. If you have very complex files or very uncommon file types, please reach out so that we can help you process them correctly. In our experience Gemini is very good in computer vision and you can analyze images very well. However, we find at this point that GPT models are still more reliable on structured output. We come to this right away.
Response format
The AI node has two types of possible response formats.
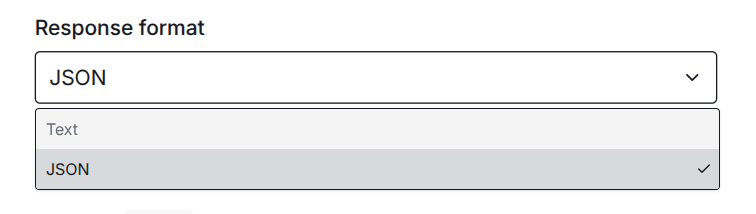
Text will only respond with a plain text of the model. It is like the answer of a chat, when you use a chat interface. This is useful, when you want that the model responds with e.g. an answer to an email or if you want just the summary of a text.
JSON is the most powerful way to structure the output of a LLM and gives you a fixed output format, that you can use programatically in any use case. This is an insanely powerful skill of a LLM to structure unstructured input in a way that you can combine it with traditional, rule based automations. The structured output also got very reliable and LLM provider put some effort in further improving this capability. It is the main output format we use for most of the automation we provide to our customer, since you can programatically process the output. You can validate the data or you can send it to any other API.
Info
For most models you must still explicitly tell them in the system prompt, that they should output their response as JSON so that the JSON response format will work. Sometimes it is even best to put more emphasis on this like "you MUST respond in JSON" or "Make sure to ALWAYS respond in JSON".
JSON Schema
If you select JSON as response type a new section appears that let you define a JSON schema.
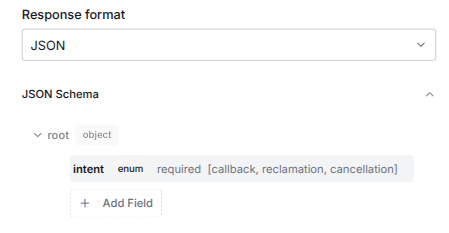
To go in detail about what a JSON schema is would not fit in this documentation. It is a way to tell the LLM how to structure the JSON output, so that the LLM has a clear instruction on how the data should be structured and what data types are expected in each response.
Note
If you want to dive deeper into the world of JSON schema have a look at this page.
If you click on one entry in the JSON schema field an editor will pop up, where you can define all the types of our JSON accordingly.
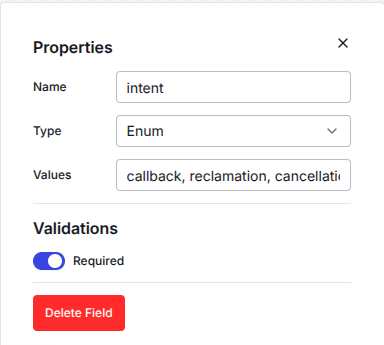
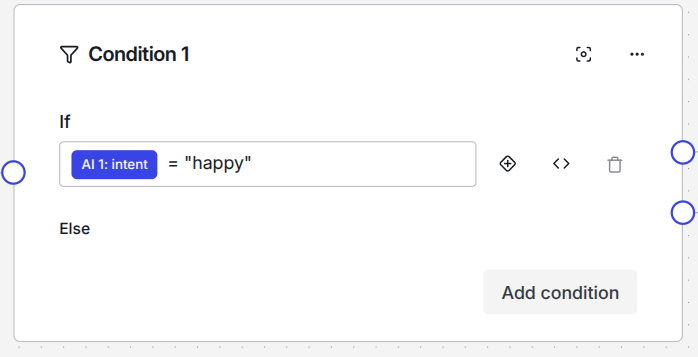
Afterwards you can use all of these types in the next nodes. The output will be stored in the according keys that are produced by your AI node. For example, if your AI node is called AI 1 and you defined intent as a key in the JSON schema, you can access this value in every consecutive node as AI 1: intent like this:
Model
We provide you with a list of LLMs that you can use right away. You can select the model you wish for each AI node in the model dropdown.
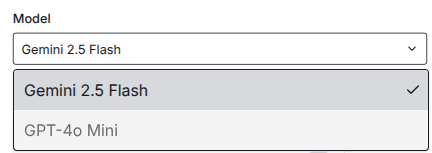
Different models might be better at certain tasks. So far, we found that Gemini models are very capable in processing all kinds of file types. That is why the attachment processing is also only available for Gemini models at this time. However, we also found that for JSON output GPT models work more reliable and are less hesitant to regard the JSON schema on each inference. The list of models will grow in future. We always have an eye on the latest fundamental model releases and we test them for various use cases. Only if we think a model provides better results in our workflows we will make them available in our dropdown.
Info
If you create a custom connector to your own LLM, e.g. in MS Azure AI Foundy, you can use this model instead of the ones we provide out of the box. If you want to use your very own LLM, please contact us, so that we can assist you with the setup.
Knowledge base
LLMs can hallucinate, which means produce outputs that we see as factual wrong. This is an unsolved issue with this technology, even while models get better and better over time. With past architectures it was very common to train a model on your data to improve it. However, this seems to be not a good way to fine tune LLMs for having knowledge about your personal intended use case. Right now the best way to give a LLM knowledge is via so called RAG. This means, that you do not train the weights of the fundamental model or attached classifier layers but that you have a separate knowledge base, where you inject the relevant parts directly in your system prompt.
Danger
Again, be aware to only inject data from a trusted source and never let user input directly get into your system prompt!
You can upload relevant documents via the sidebar under Manage knowledge documents.
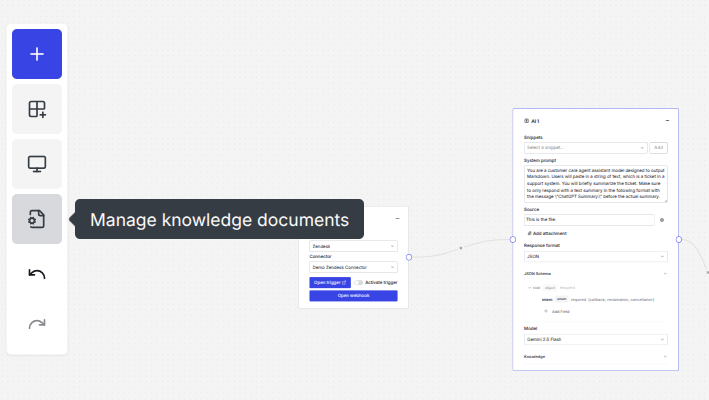
After you click the icon the document manager will open and when you click on the File input box you can select documents from your local filesystem.
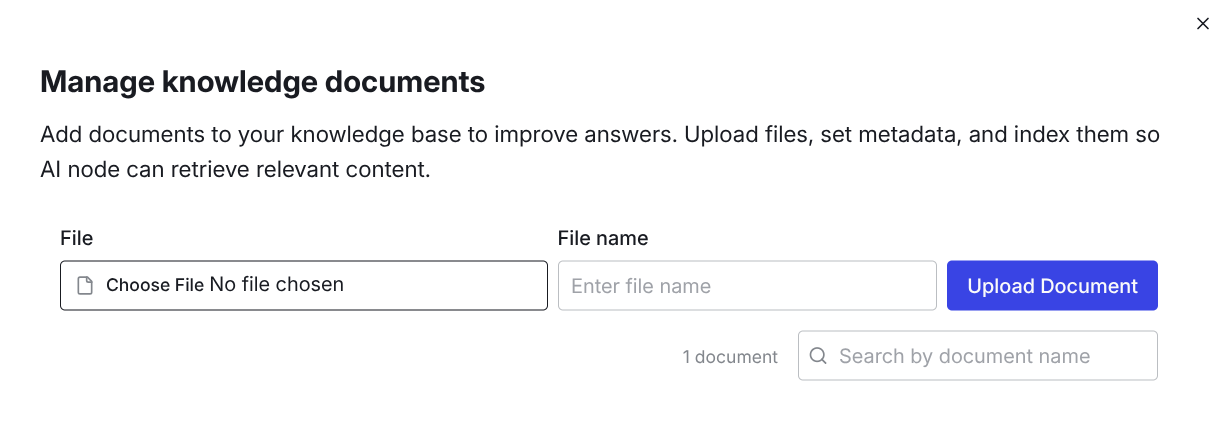
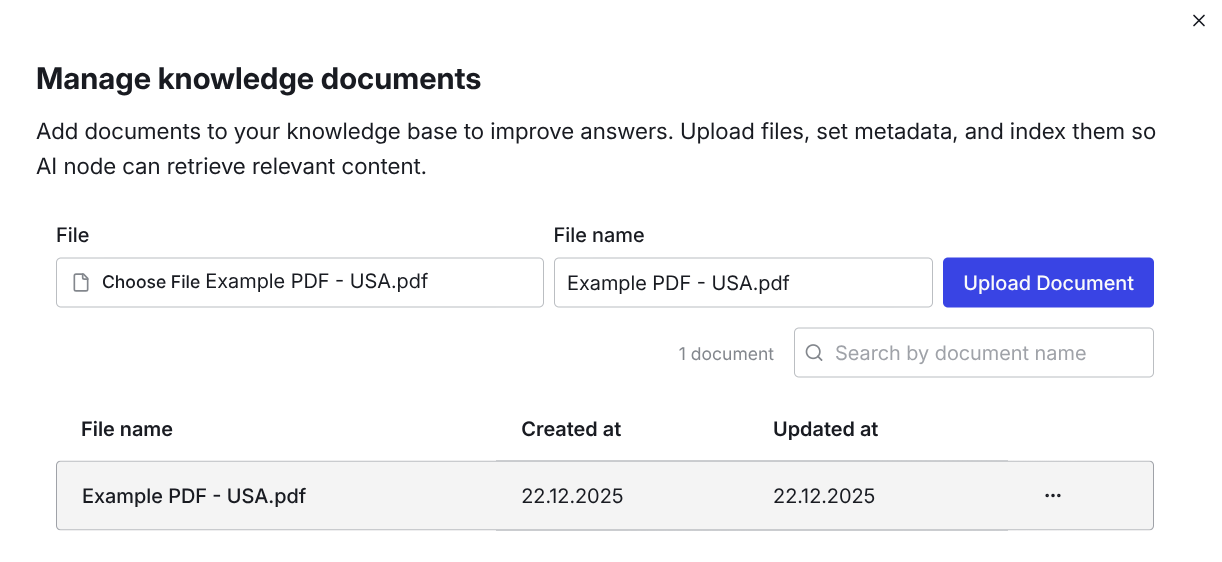
After selecting the document you can optionally give it another name. Click Upload Document and you will find the document permanently in your knowledge base. You also can rename the document at a later point, if you click on the three dots next to the document to edit the filename. When you have uploaded a document it should look like this:
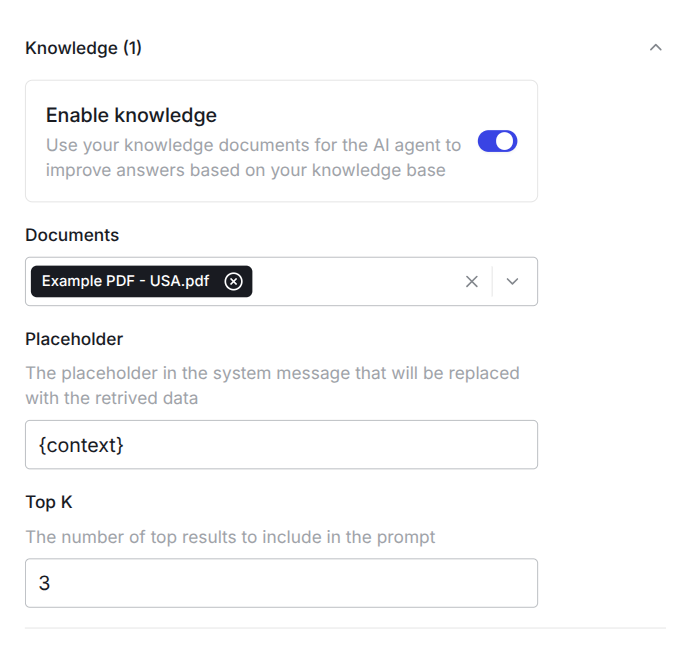
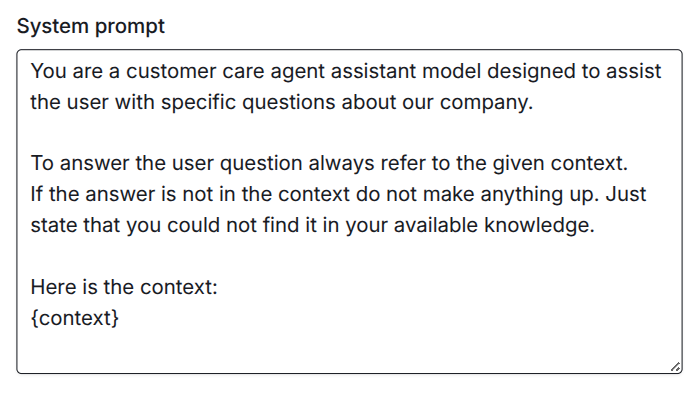
Now you can enable the knowledge base in the AI node by clicking the Enable knowledge switch. Under Documents you can select which documents should be referred by the {context} placeholder. You can give the placeholder a different name if you change the expression between the braces. Under Top K you can select which chunks of the uploaded documents should be used, based on the similarity search we perform.
Now you can include your knowledge base in your system prompt dynamically. You can prevent hallucinations by instructing the model to only use the information given in the context. There are more ways to improve the outcome with a good system prompt. Here is a basic example to show you how to use the context placeholder:
If you struggle with the setup of your workflow, please reach out to us! We are happy to help you with automating your use case and setting up your workflows: support@knots.io